
First, be certain the car is clean and FRESHLY WAXED. TrakkTape has lots of grip, but don’t try to apply it immediately after washing the car, as water around moldings, gaps, etc. can cause vapor under the tape on a warm day. Normally, just a light wipe off with a damp towel is fine.
ALTHOUGH WE HAVE HAVE VERY VERY FEW ISSUES OVER THE YEARS WITH THE USE OF TRAKKTAPE, WE HIGHLY RECOMMEND A NICE COAT OF PASTE WAX BEFORE APPLYING TRAKKTAPE WHICH TILL GIVE AN EXTRA LEVEL OF PROTECTION. OLDER SINGLE STAGE PAINT JOBS WILL PARTICULARLY BENEFIT FROM THIS.
PLEASE DO NOT USE TRAKKTAPE ON ANY MATTE FINISH!!! WE DO NOT RECOMMEND IT.
It is ESSENTIAL that you work from the back and go forward of the area to be protected. Using the felt side of the squeegee, work from side to side, pressing out the bubbles as you go. The next strip should overlap the previous one slightly to protect the leading edge from airflow. In our experience, don’t spray the area with anything. Just install it dry.
Put some extra pressure on any leading edge. You will be surprised how the wind can start to nibble at those small edges. And don’t try to stretch it much. You can overpower the adhesive by doing this.
Here is a helpful short video showing the actual installation technique.
Don't work from the roll when applying the tape. Cut off the approximate length you need before starting to apply it. Often you can stick one end down temporarily to the car, as you go across to see how much you need. We find a sharp knife like an Xacto is better than scissors.
When using the applicator, use the felt side and push toward the direction that you are laying the tape. Try running straight down the center of the tape with the first pass. Then go back and smooth down the edges. Sometimes, depending on the contour, that helps control bubbles.
When working around headlight surrounds, trim, etc, you may want to trim the tape carefully with an Xacto or similar blade and then cover the headlight or trim separately. This is all dependent on how concerned you are with a more finished installation.
If you are working around a grill or similar opening, you will generally get the nicest finish by cutting 6 to 12” long (x 6") strips and using them vertically wrapping down and into the grill opening. A bit faster, but not quite as tidy method, is to run a strip horizontally the full width of the grill, sticking it first to the flattest forward facing section that will accept the tape smoothly. Then, you can cut vertically into the remaining tape to allow you to stick it down in pieces that compensate for the curves.
Don't forget to check to see if you need to do more than just the front of the car. The Lotus Elise on the home page is particularly vulnerable in the area in front of the rear wheels. The fronts of mirrors are another area that is often forgotten.
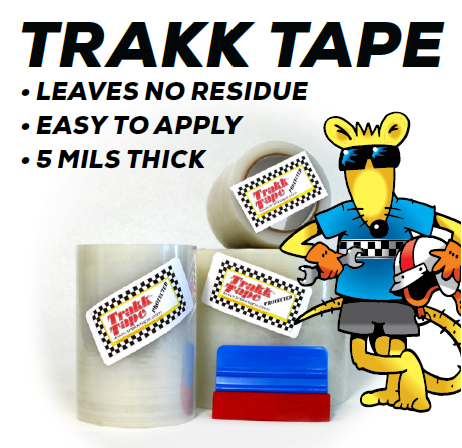
Areas that are very flat to the front of the car might benefit from an additional layer of protection. These leading edges will take the full force of any incoming rock or object, whereas the sloping areas receive a glancing blow with substantially less force for damage. FYI, the tape is 5 mil thick. Most “clear bras” are 8 mil.
On the Lotus shown on the Home page and many other cars, the area in front of the rear wheel wells really takes a beating. This is one area that really needs extra protection. We normally run 3-4 layers there. If you stick a wheel off the edge of the track, it’s like a shotgun blast to those rear flares, so lay down a little extra tape.
If you tape over your headlights and then turn on the lights, check to see that the tape is not overheating. It should be fine, but you never know. The Lotus Elise used for much of our R&D has daytime running lights so they are on all day on the track with no issues. I can also see well enough at night with the tape in place to make it to the track.
IF YOU HAVE NON-GLASS HEADLIGHTS, PLEASE READ THE NOTES IN RED BELOW!
If you are really fussy about the small bubbles that occur at times, they can be lightly tapped with a sharp Xacto blade or needle and then pressed out. The sort of job shown on our web site is virtually invisible to a trackside photographer!
For the quick and dirty approach, you can either work back to front in strips that are running lengthwise on the car, or do bands crossways on the car. If you do crossways bands, again start in the back to protect the leading edges from lifting. Be sure and really press down any leading edges tightly.
In this method, just press down around headlights, turn indicators and then keep going. You can go right across grill and other openings, then just cut them out and fold the remaining tape back into the opening. It doesn't look great, but works fine and is still better than blue tape! This is more for throwing on quick protection for a quick track day.
At the end of the day, just peel off TrakkTape (and rubber marks) and throw it away. It's much when it is still warm from the sun. If it is a warm day, you can probably peel off several strips at once. On a colder day, it might be better to take them off one at a time. PEEL THE TAPE OFF SLOWLY BACK ON ITSELF AT A 45 DEGREE ANGLE. If you are seeing some residue, which is very rare, try a 180 degree angle. If it is at the end of a cold day, it is easier to let the car sit in the sun a bit the next morning and then pull the tape off.
After using TrakkTape personally for many years with no residue issues, I recently used it on a cool and very rainy couple of days. When I pulled it off, there was residue I have never seen before. I could remove it with rubbing alcohol, but now would suggest that TrakkTape not be used in wet conditions. I never had trouble in the cold alone. Also, I recently did a long weekend with quite a bit of rain, but the weather was warmer and again, no problems. So it just seems to be the combination of extreme rain and cold that caused the residue issue. SEE THE FAQ'S IF YOU HAVE RESIDUE.
Other uses for TrakkTape: it’s great to put down temporary fender protection when working on your car. A couple of layers gives extra cushioning.
You can also use it like a giant lint remover on cloth tops. Cut a strip a couple of feet long and stick it down on your top, then remove. Repeat as needed.
And finally, I have started keeping a wad of it in my closet. I like black shirts and pants and we have two cats. Works great on our clothes, not so good on the cats!
Disclaimer (Lawyer stuff!) and some more notes about headlights!
Even though TrakkTape is designed as a protective tape and is intended to be applied to factory finishes and then later removed without damage to the underlying surface, there are simply too many variables out there to guarantee against possible damage to all surfaces upon removal. We have never personally encountered any issues by using the tape on factory PAINT, even after leaving the tape on for several days.
AN UNKNOWN VARIABLE IS ANY COATINGS ON NON-GLASS HEADLIGHTS. IF YOU HAVE CONCERNS IN THIS AREA, WE SUGGEST COVERING THE HEADLIGHT WITH KITCHEN STYLE CLING WRAP
AND THEN PUT TRAKKTAPE OVER THAT TO HOLD IT IN PLACE.
THEN THE HEADLIGHT IS WELL PROTECTED